The Netgear EX6150 extender is an effective device made to improve Wi-Fi coverage in your home or place of business. It uses the 2.4GHz and 5GHz bands at the same time, allowing for increased speed and less interference. It’s simple to set up, but using the Netgear EX6150 setup Assistant to connect to an existing Wi-Fi network is frequently required. It is simple to install and blends in with your surroundings thanks to its small size and wall-plug form factor. For a secure extended network, the EX6150 has capabilities including Wi-Fi Protected Access (WPA/WPA2-PSK) security. The Netgear EX6150 extender makes sure you’re connected across your area by removing dead zones and offering an enhanced Wi-Fi experience.
Follow these steps to setup your Netgear EX6150 extender manually:
Wait for the EX6150 extender to turn on after plugging it into an electrical socket.
Go to your Wi-Fi settings on your computer or mobile device and join the network “mywifiext.”
the connected device’s web browser should be opened.
Enter “mywifiext net setup” in the address bar and press Enter.
Create a new account or sign in with your existing Netgear account if asked to do so.
During the setup procedure, the Netgear Installation Assistant will direct you. obey the directions displayed on the screen.
Select the Wi-Fi network you want to use and type the password. Press “Next.”
Use the SSID and password on the extender to connect your devices (computer, smartphone, or tablet) to the extended Wi-Fi network.
Click “Finish” to complete the setup procedure once you are connected.
To provide adequate coverage, position the extender in an appropriate area.
If you want the strongest signal, you might need to move it.
Receive professional setup assistance for your Netgear devices, exclusively provided by mywifiexthelp.online.
Netgear Ex6150 Setup via wps button
Your Netgear EX6150 extender setup via wps and prepared to successfully increase your Wi-Fi coverage.
The methods for setup the Netgear EX6150 extender utilising WPS are straightforward and include:
Make sure the EX6150 extender is turned on by plugging it into an electrical socket.
The extender’s WPS button should be pressed. The extender’s WPS LED ought to begin blinking.
Press the WPS button on your current Wi-Fi router in 2 minutes.
A successful connection with your router will be indicated by the WPS LED on the extension turning solid white.
If necessary, move the extender to a spot with the best Wi-Fi reception.
Use the SSID and password on the extender to connect your devices to the extended Wi-Fi network.
Firmware update for Netgear EX6150 extender
Follow these procedures to upgrade the firmware on your Netgear EX6150 WiFi extender.
Make that the network of the Netgear EX6150 extender is connected to your computer or mobile device.
the connected device’s web browser should be opened.
Enter “mywifiext” in the address bar and hit Enter.
To sign in, enter your username and password. Use the default username and password if unique login credentials have not been set up.
In the extender settings menu, look for a “Firmware Update” or “Software Update” option. To check for updates, click on it.
If a new version of the firmware is accessible, adhere to the on-screen directions to download and install the upgrade.
Give the extender time to finish updating its firmware. This might require a reboot.
Receive professional setup assistance for your Netgear devices, exclusively provided by mywifiexthelp.online.
How do i reset Netgear ex6150?
Follow these procedures to restore the Netgear EX6150 WiFi extender to its factory preset settings:
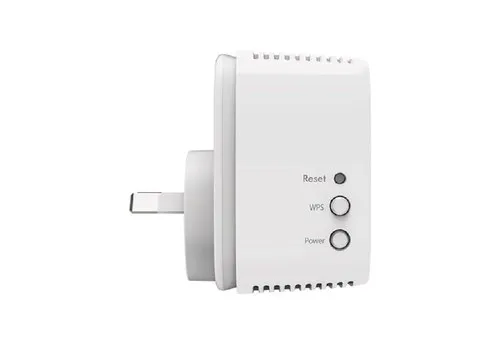
To reset your Netgear EX6150 extender, locate the reset button. Usually, the extender has a little hole on the side or rear with the word “Reset” written in it.
Press and hold the reset button for roughly 10 seconds, or until the power LED blinks, using a paperclip or any similar object.
Once the power LED begins to blink to signal that the reset procedure has started, release the reset button.
Give the extender a chance to return to its default settings. This procedure could take a short while.
Use the default SSID and password to rejoin the extender’s Wi-Fi network after the reset is finished.